|
|
|||||||
| The Sheath/Holster Makers Forum This is the place to discuss all forms of sheath and holster making. |
 |
|
|
Thread Tools | Display Modes |
|
#1
 02-11-2013, 04:16 PM
|
||||
|
||||
|
Hi all,
I am currently in the process of constructing a belt sheath for my Fiskars hatchet (give that cold plastic thing at least a little charm). The thickness of the hatchet requires a rather thick welt as seen in the pics below. I've already skived and bonded the welts with contact cement... haven't drilled or awled any stitch holes yet. Question: When building a sheath with welts of this thickness is thread stitching alone (in addition to the contact cement) sufficient? Or.... something (?) in addition to thread stitching at the stress points? Rivets? Bolts? Maybe the stitching should do it? I'm using thick waxed nylon with a #6 stitch wheel, so pretty tight stitch. Want to make sure before I continue. I want this to be functional and durable. Thanks! 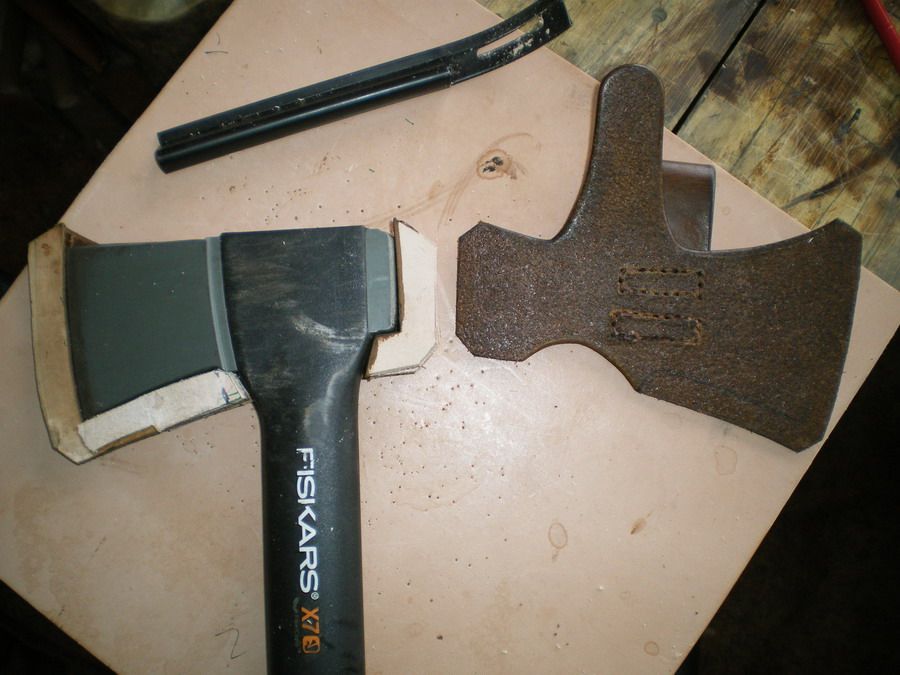 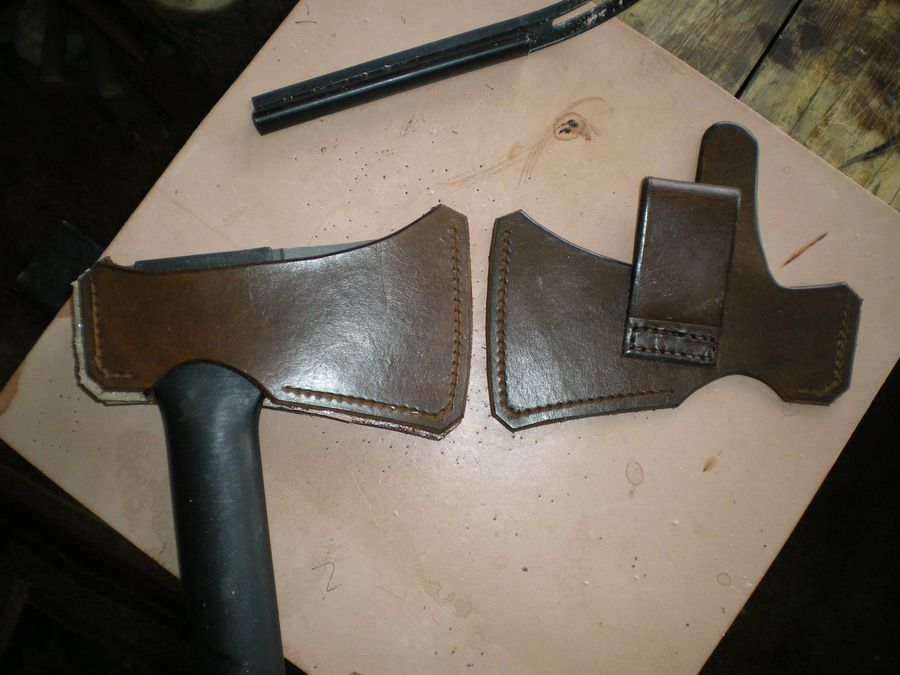 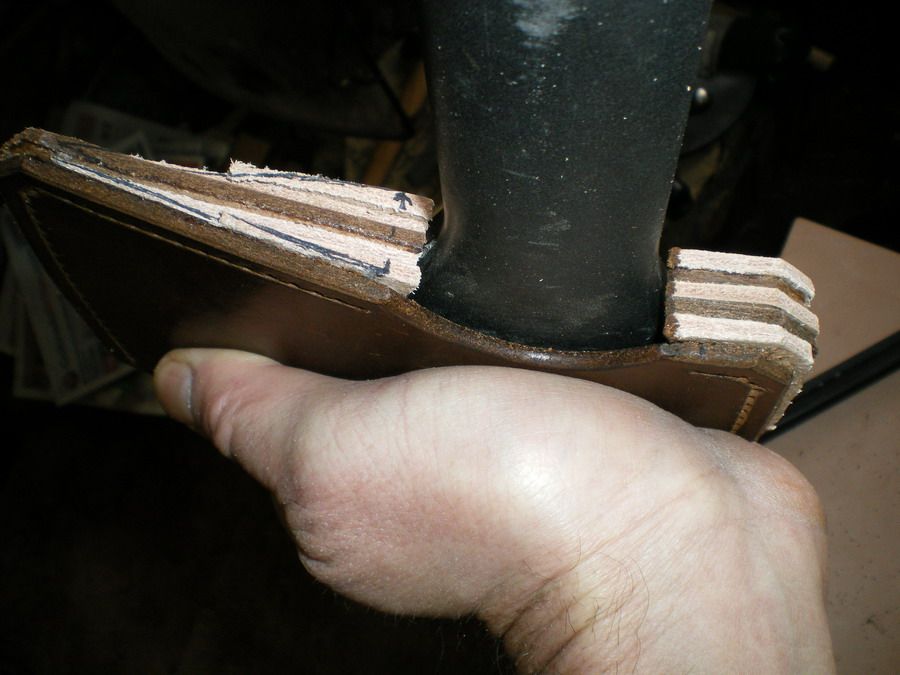 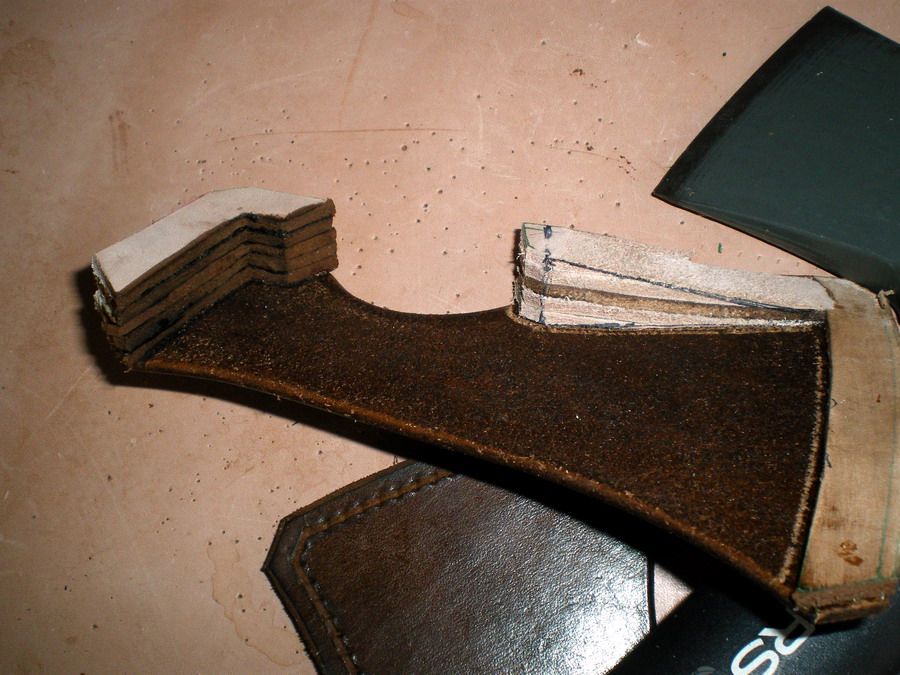
__________________ Stay away from fast women and slow horses Last edited by rockhound; 02-11-2013 at 05:48 PM. 
|
|
#3
02-17-2013, 05:53 PM
|
||||
|
||||
|
I finished it without rivets. The stitching is tight and I doubled it at the thicker welt areas. It'll get plenty of field testing this summer. I'm right handed but made this a lefty... usually have K&G holstered on the right when in the woods.
Since the last pics I had to shorten the length of the lower blade support welt to allow a larger opening for the bottom of the hatchet handle (pic #2). 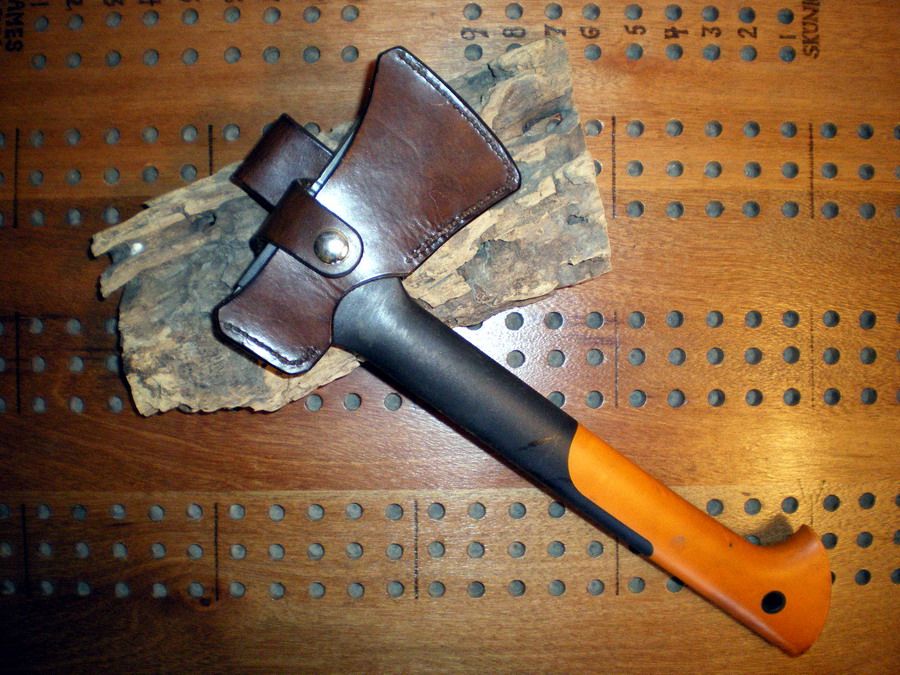 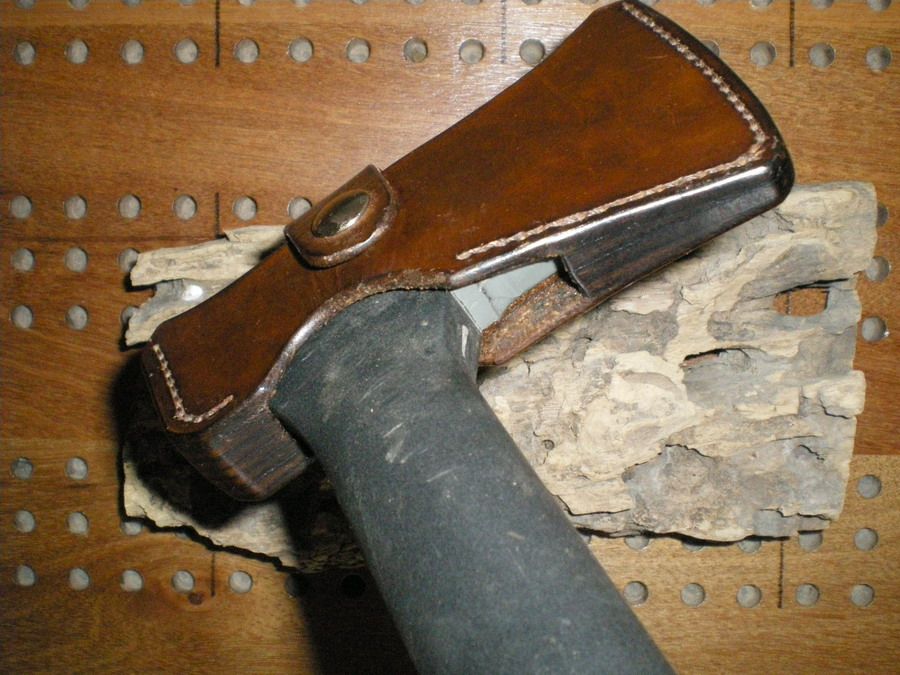 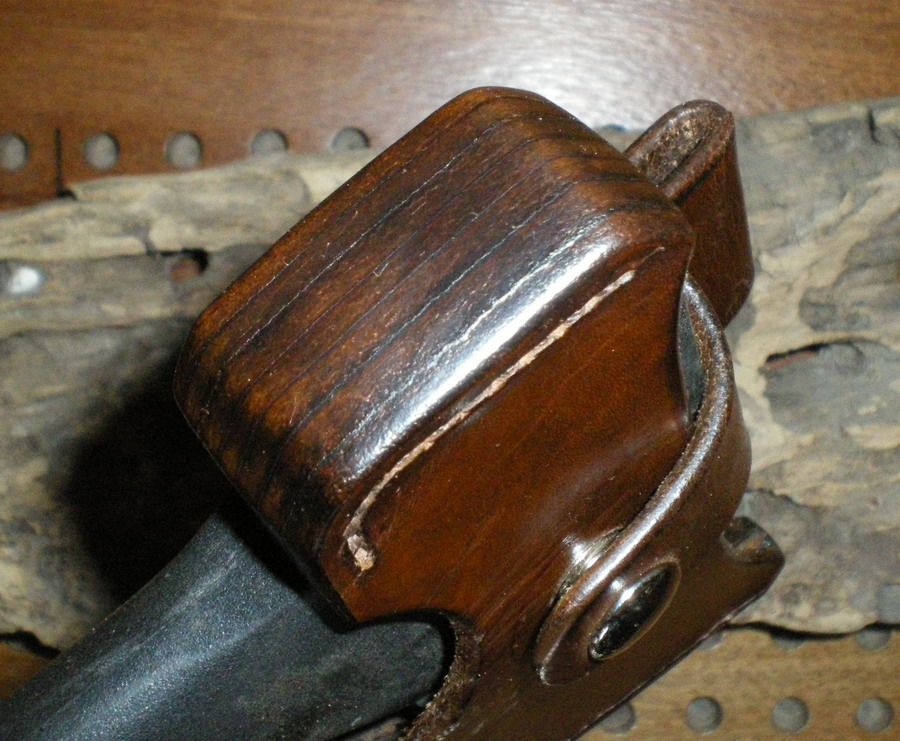 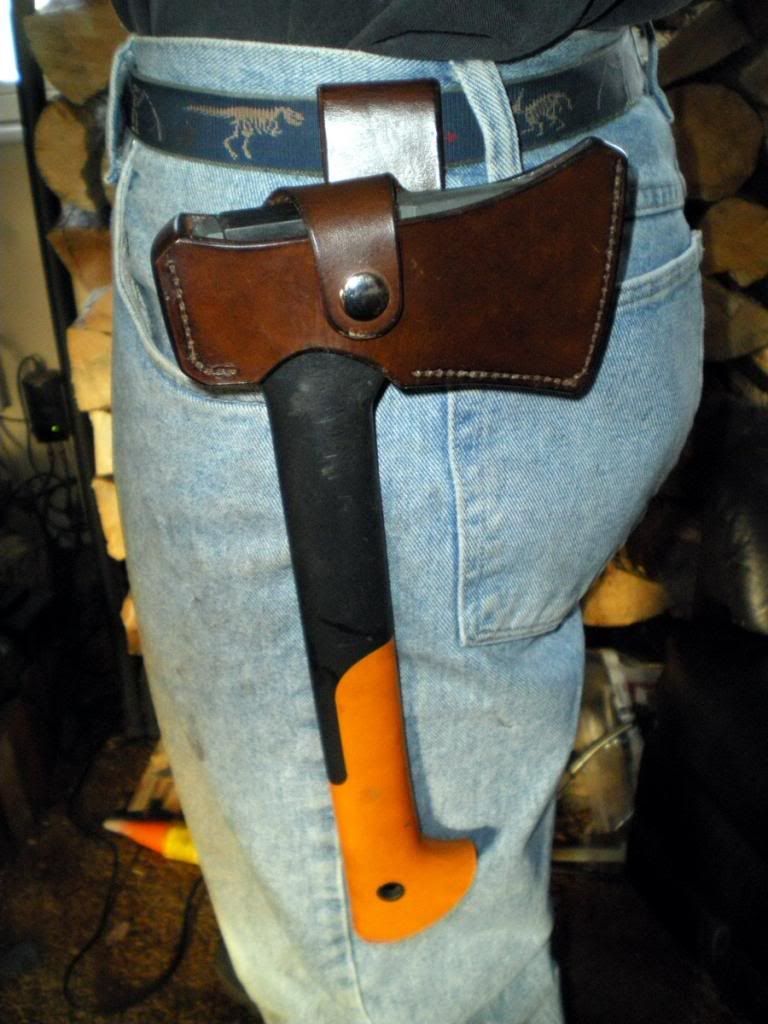
__________________ Stay away from fast women and slow horses
|
|
#5
02-18-2013, 07:37 PM
|
|||
|
|||
|
As a leather worker of over 55 years, I would rate your work as EXCELLENT. I see nothining wrong with the design or the execution and the welt finish is super. It is a job any one would be proud to put his makers mark on. Keep up the good work. Bob Levine Knifemakers Guild.
|
|
#6
02-21-2013, 09:19 AM
|
||||
|
||||
|
Bob & Rob,
Thanks so much! This has become a labor of love, I really enjoy it. Bob, that welt finish took longer than I care to admit but it worked out well. The toughest part of that hatchet sheath was aligning the stitch holes on both sides where the welt was 7 layers thick. That was really a challenge. I don't know anything about maker marks for leather yet but will figure out stamping and purchase stuff for that eventually. Now I want to learn how to make a pouch sheath so I'm attempting it for a DDR3 which I put together a while back. Should be fairly straight forward and relatively easy. I'm currently fabricating my first "Last" to form the pouch. Not a friction pouch... it will have a snap. 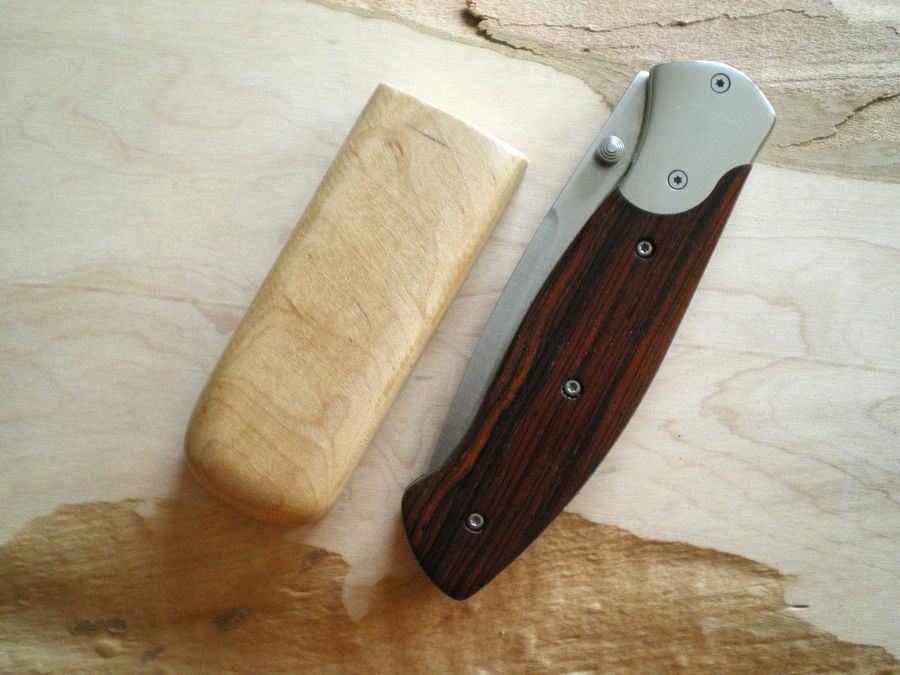
__________________ Stay away from fast women and slow horses
|
|
#7
02-22-2013, 11:14 AM
|
|||
|
|||
|
Rockhound, friend,----You could eliminate all but one thickness of welt (on the edge side of the handle) by using one piece construction. The sheath would wrap around the butt of the hawk completely eliminating the welt there. The only welt would be at the edge end of the hawk and on the lower retention shelf. The retention shelf welt can be brouht to one thickness by molding the leather around the hawk. This would result in a better looking sheath with MUCH less labor. The work you have shown is very good but is very tedious in nature. Sandy
__________________ Martin (Sandy) Morrissey Master Leather Craftsman 1105 Stephens Road Blairsville, GA 30512 706-379-1621
|
|
#8
02-22-2013, 11:44 AM
|
||||
|
||||
|
Sandy,
Thank you! The method you described makes perfect sense. This was indeed a bit tedious but was the solution my mind came up with when I was patterning. More experience and the valuable input from you guys will open my mind to more efficient designs. When contemplating the design for that Fiskar I searched Google images and really didn't see anything I liked which would suffice as a good sturdy belt-carry sheath. I wish I'd have thought of your suggestion prior but this wound up being a good exercise and learning experience since I'm still a beginner when it comes to leather work. I'm learning!  Working on this DDR3 sheath now. I set the leather in my "Last" last night. The top piece of the Last (U-shaped wooden press) split at the head during clamping but I don't think it will effect the forming. I can repair or replace the wood piece later. I'm going to leave it like this for a few days. 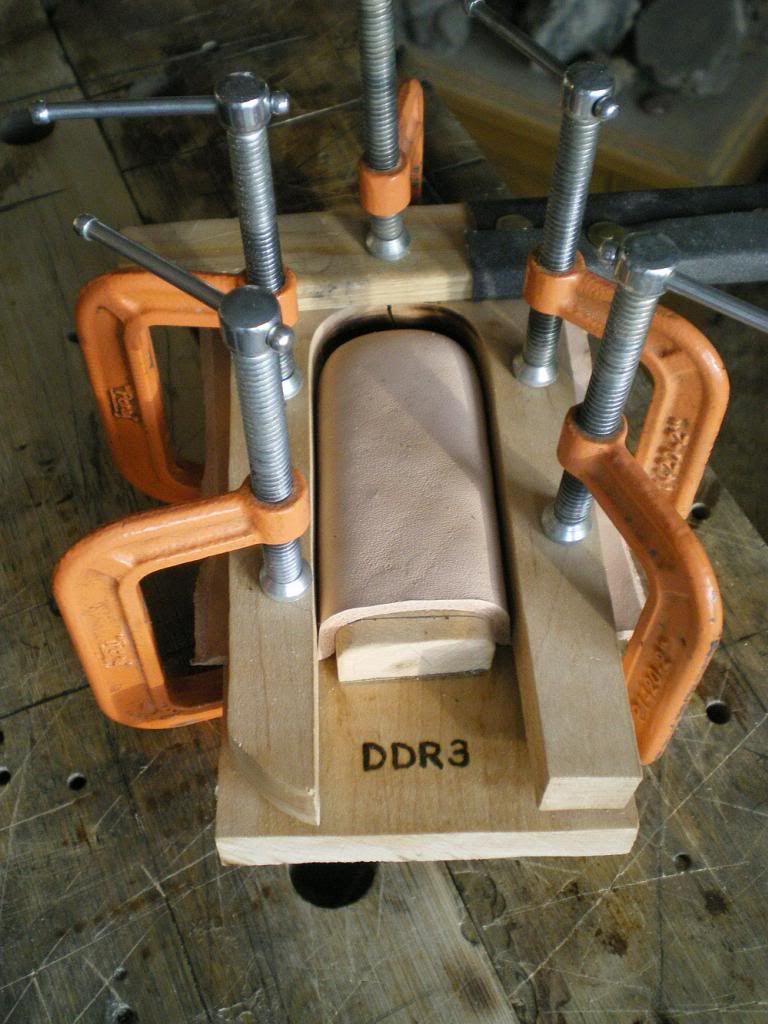
__________________ Stay away from fast women and slow horses
|
|
#9
02-23-2013, 07:29 AM
|
||||
|
||||
|
Looking good Chris!
I'm with Dad on the one piece pattern. Little figguring but worth the extra effort in simplicity. I know Dad is no fan of rivets, but I'd rivet the stress points at each corner. With the one you finished, you could use the longer copper rivet/washer combo due to the thickness of the welt. Axes and hatchets have a lot of outside play stresses that will work on the seams pretty hard. How's the snow melt going? __________________ Carl Rechsteiner, Bladesmith Georgia Custom Knifemakers Guild, Charter Member Knifemakers Guild, voting member Registered Master Artist - GA Council for the Arts C Rex Custom Knives Blade Show Table 6-H
|
|
#10
02-23-2013, 08:46 AM
|
||||
|
||||
|
Quote:
 Still below zero most nights and our snowiest month is yet to come. We're at about 75% snowpack right now... expecting more this weekend. __________________ Stay away from fast women and slow horses
|
|
#11
02-23-2013, 07:03 PM
|
||||
|
||||
|
You need to take up forging. Stay toasty warm while you work!
__________________ Carl Rechsteiner, Bladesmith Georgia Custom Knifemakers Guild, Charter Member Knifemakers Guild, voting member Registered Master Artist - GA Council for the Arts C Rex Custom Knives Blade Show Table 6-H
|
|
#12
02-24-2013, 10:44 AM
|
|||
|
|||
|
Rockhound, friend, The mold you picture looks very good. The splitting of the female portion would cease if you made it of hardwood plywood. I would also consider cutting the female portiion so the squared end of the male mold would butt against the female portion. In this way the curved portion of the leather being molded would not have the tendency to slip out and fail to maintain a vertical wall. Sandy
__________________ Martin (Sandy) Morrissey Master Leather Craftsman 1105 Stephens Road Blairsville, GA 30512 706-379-1621
|
|
#13
02-25-2013, 02:36 PM
|
||||
|
||||
|
Sandy,
Thank you again. I used some scrap maple for this and absolutely knew there had to be something better. Plywood makes perfect sense and I should have thought of that. I'm also going to take your advice regarding the square end of the mold, definitely the right approach. Thanks! I'm glad I posted pics of that now. __________________ Stay away from fast women and slow horses
|
|
| Tags |
| 5160, back, blade, building, chris, design, easy, forging, handle, hawk, holster, how to, knife, leather, leather die, leather tooling, made, make, molding, press, rivets, sheath, stitch, tanning, woods |
| Currently Active Users Viewing This Thread: 1 (0 members and 1 guests) | |
|
|
 Similar Threads
|
||||
| Thread | Thread Starter | Forum | Replies | Last Post |
| Sheath Retention - Adjustable Welt(s) & Straps | Chuck Burrows | The Sheath/Holster Makers Forum | 2 | 01-24-2004 12:24 AM |
| Source for welt material? | RickNJ | The Sheath/Holster Makers Forum | 6 | 12-08-2002 11:25 PM |
| Gemstone Question and Finishing Question | Fiferguy | The Newbies Arena | 4 | 08-13-2002 09:26 AM |


 Linear Mode

