|
|
|||||||
| The Newbies Arena Are you new to knife making? Here is all the help you will need. |
 |
|
|
Thread Tools | Display Modes |
|
#2
 06-15-2013, 04:41 PM
|
|||
|
|||
|
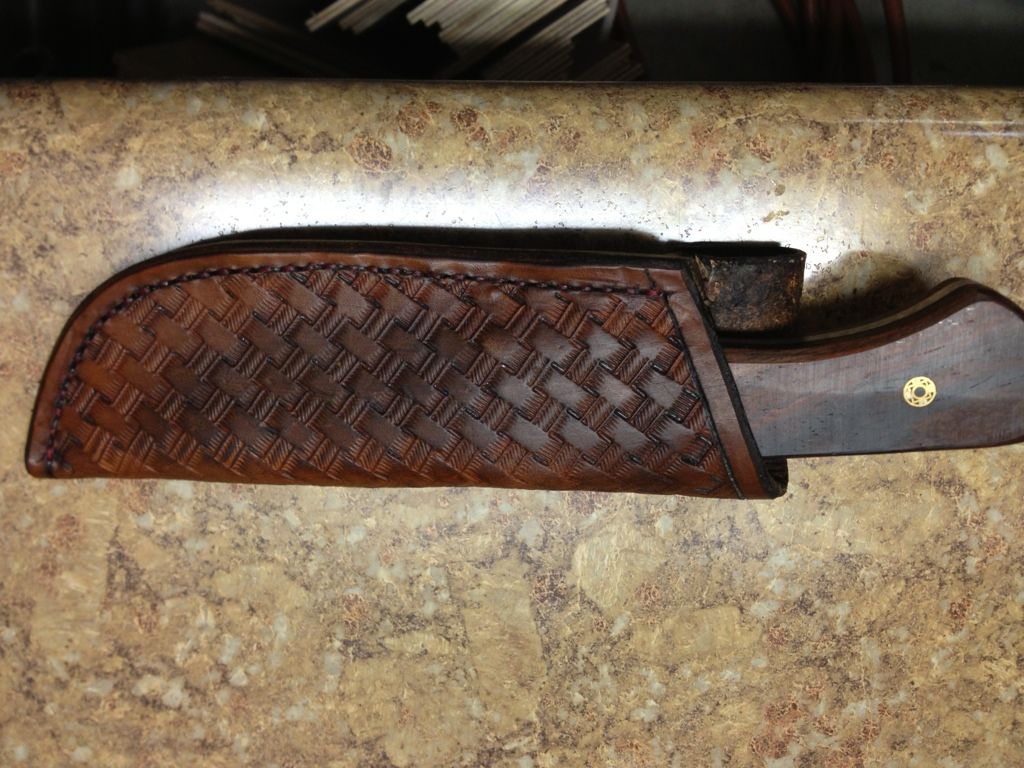
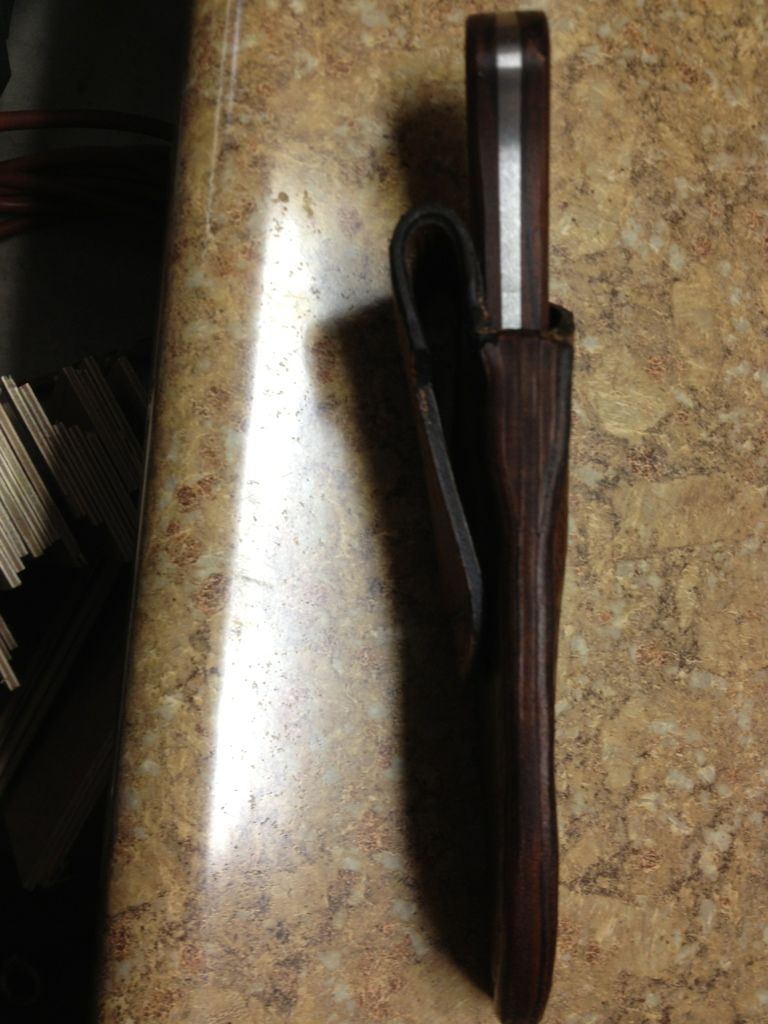
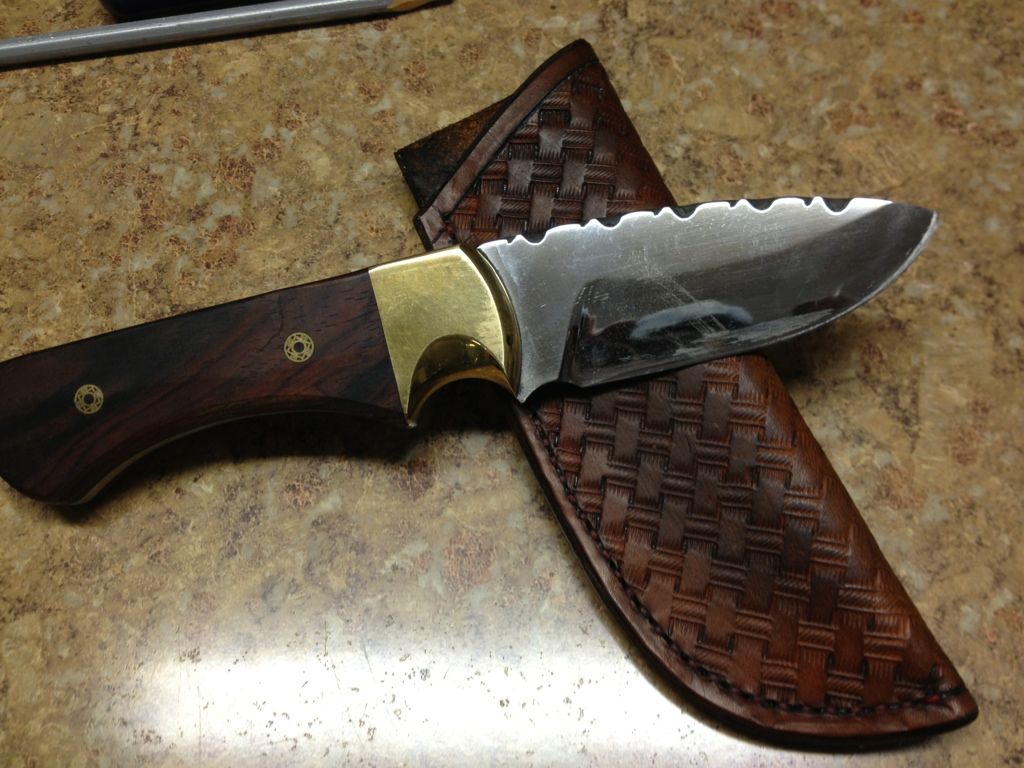
For a first attempt at a sheath I would say you did a great job! The tooling turned out really crisp. Keep it up!
The only thing I see on the whole package is the handle shape could be smoothed and rounded a little more. __________________ J, Saccucci Knives, JSK 
|
|
#3
06-15-2013, 04:46 PM
|
|||
|
|||
|
Quote:
|
|
#4
06-15-2013, 06:23 PM
|
||||
|
||||
|
I agree, you did a great job for a first sheath. Lots of guys make quite a few sheaths before they get one as nice as that.
Looks to me like to tried to finish your edges and that's something many overlook on their first efforts. But, you need to do a little more of the edges. Looks like you used some edge dye and that's fine but the edges could have been sanded a little flatter first. Once you get the edges flat and dyed then you need to burnish them with Gum Tragacanth. You can get GT from wherever you buy your dye and leather working tools. It's the final touch that creatres a really professional looking edge on the sheath .... __________________ Your question may already have been answered - try the Search button first!   
|
|
#5
06-15-2013, 09:00 PM
|
|||
|
|||
|
What I do on the edges of my sheaths is to wet them lightly with water and burnish them with my burnishing tool which happens to be a bore's tooth. Then I give them a good coating of Gum Tragacanth and burnish it again. You can also do the to the flesh side of a strap to give it a less sued like appearance. You might also try making the belt loop of a separate piece of leather and sewing it down with the skin side out.
You did a real nice job with the stamping. It's not all that easy to keep that pattern lined up and straight and you didn't even have to use a camouflage tool to hide the usual irregularities at the edge of the stamping. The stamp was also nice and deep. What weight leather did you use? Doug __________________ If you're not making mistakes then you're not trying hard enough
|
|
#6
06-15-2013, 09:56 PM
|
|||
|
|||
|
One thing that really stands out to me is the antique down in the stitching holes. If you are going to antique do it before you sew. The antique gets down into the holes and makes it look dirty.
A belt sander with a brand new 36 grit belt is your best friend when smoothing out edges. For burnishing, dampen the edges with water and rub the edge with glycerin soap. Briskly rub the edge with canvas or denim. Very fast and easy and your edges will look amazing. Aaron
|
|
#8
06-16-2013, 05:24 AM
|
|||
|
|||
|
Quote:
|
|
#9
06-16-2013, 11:28 AM
|
||||
|
||||
|
Good job Kev; looks great for your first one.
__________________ Bob Jankowski <>< Jank Custom Knives Burleson Tx. www.jankcustomknives.com For I am not ashamed of the gospel, because it is the power of God that brings salvation to everyone who believes: first to the Jew, then to the Gentile.
|
|
| Tags |
| antique, bee, brand, easy, flat, handle, leather, make, making, package, pattern, sheath, sheaths, stitch, strap, tools |
| Currently Active Users Viewing This Thread: 1 (0 members and 1 guests) | |
|
|
 Similar Threads
|
||||
| Thread | Thread Starter | Forum | Replies | Last Post |
| Finally finished, Knife & Sheath | Chris Meyer | The Display Case | 8 | 02-17-2006 12:21 PM |
| CactusRose #2 - THE SHEATH (finally!) | Chuck Burrows | The Outpost | 10 | 11-22-2003 09:36 PM |
| Full Nickel Silver Sheath Tutoril Finally | beknives | Fit & Finish | 6 | 03-06-2002 05:55 AM |
| Nickel Silver Sheath Tutorial Done finally | beknives | The Sheath/Holster Makers Forum | 4 | 03-02-2002 10:32 PM |
| Full Nickel Silver Sheath Tutorial Finally | beknives | Member Web Sites : Links & Updates | 3 | 02-28-2002 07:38 PM |


 Linear Mode

