|
|
|||||||
| The Newbies Arena Are you new to knife making? Here is all the help you will need. |
 |
|
|
Thread Tools | Display Modes |
|
#1
 04-29-2012, 10:32 PM
|
|||
|
|||
|
Latest knife, and how to fix it?
Finished this one today, here are the stats:
length 6.5" blade 2.75" steel 1075/1080 handle striped ebony Pins are brass, copper, and piano wire 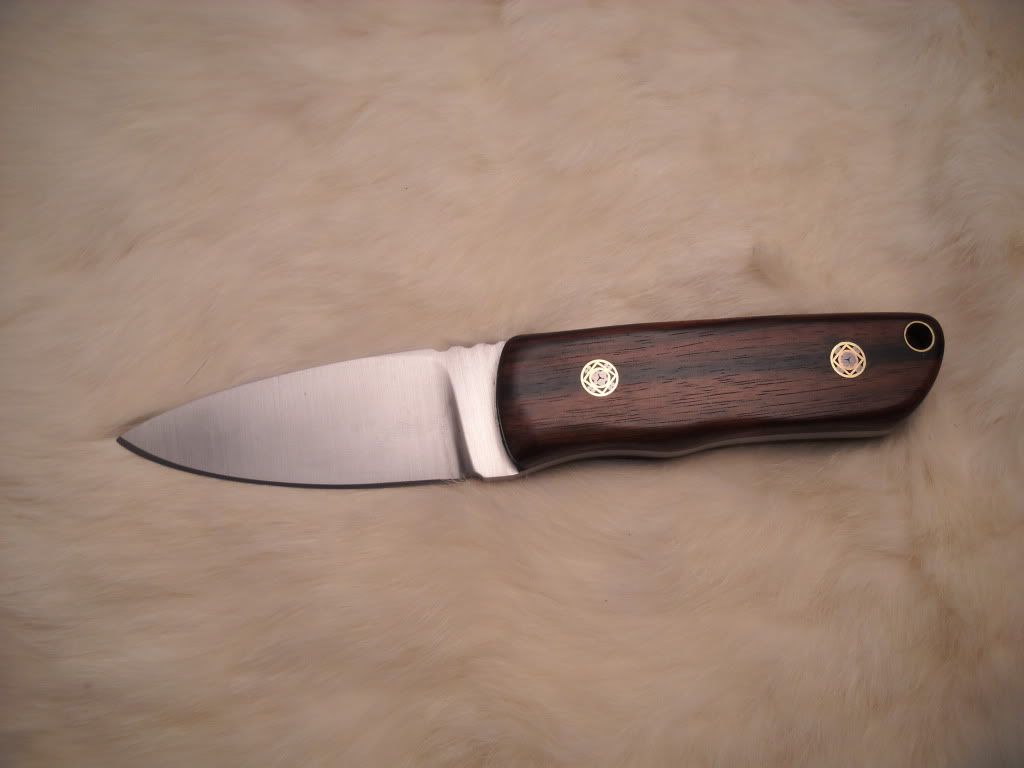 There are two problems with it, one I cant fix and one I am hoping for tips on how to fix. The non fixing issue, I tried to etch the hamon with ferric chloride. I sanded it to 1300 grit, etched in a 3 to 1 water, FC. Etching for 20 seconds and then sanding with 0000 steel wool. I also tried the above and then sanding with 1500 grit sandpaper. Still looked horrible, so i sanded with a scotch brite belt so it wouldn't be so noticeable. I clay coated the blade for the quench using a coating of Satanite Refractory Mortar. I think that it pulled away from the blade while it was in the forge and the parks 50 went under the clay. 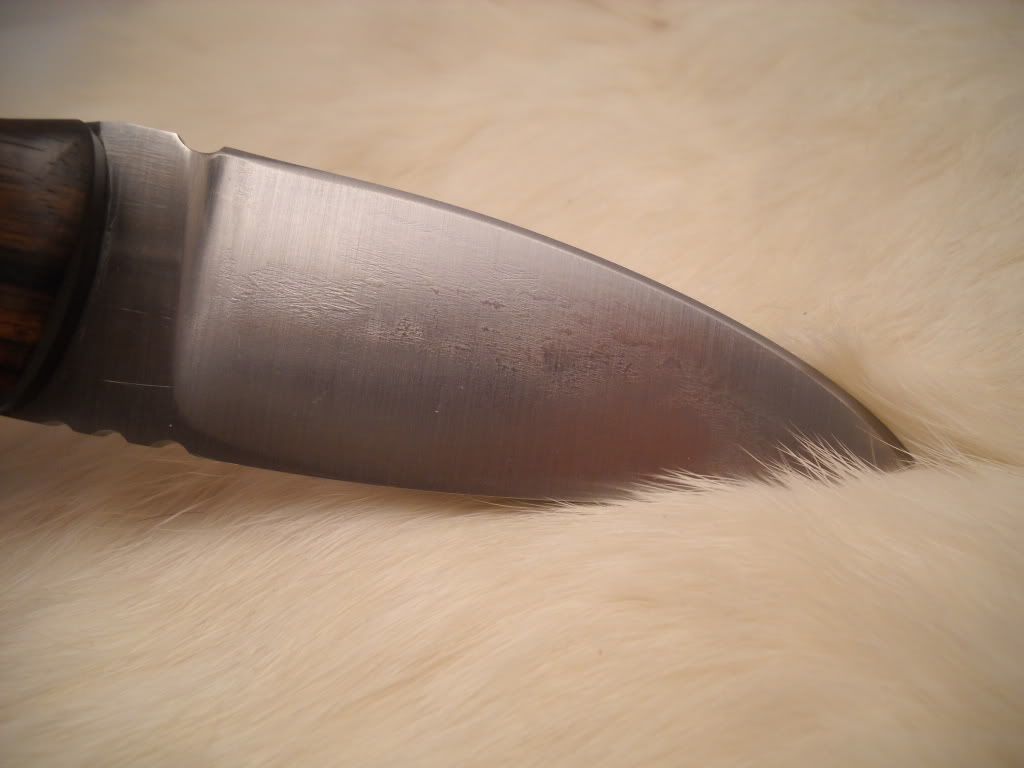 Now for the problem i need help with. The fit of the lanyard tube was a little too snug and it cracked while i was using the arbor press to put it in. I didn't realize it until i finished the handle, is there something i can use to fill the gap and reduce the chance of the further cracking the handle? This will be one of my work knives so I don't mind if it is noticeable, as long as it isn't glaringly obvious. 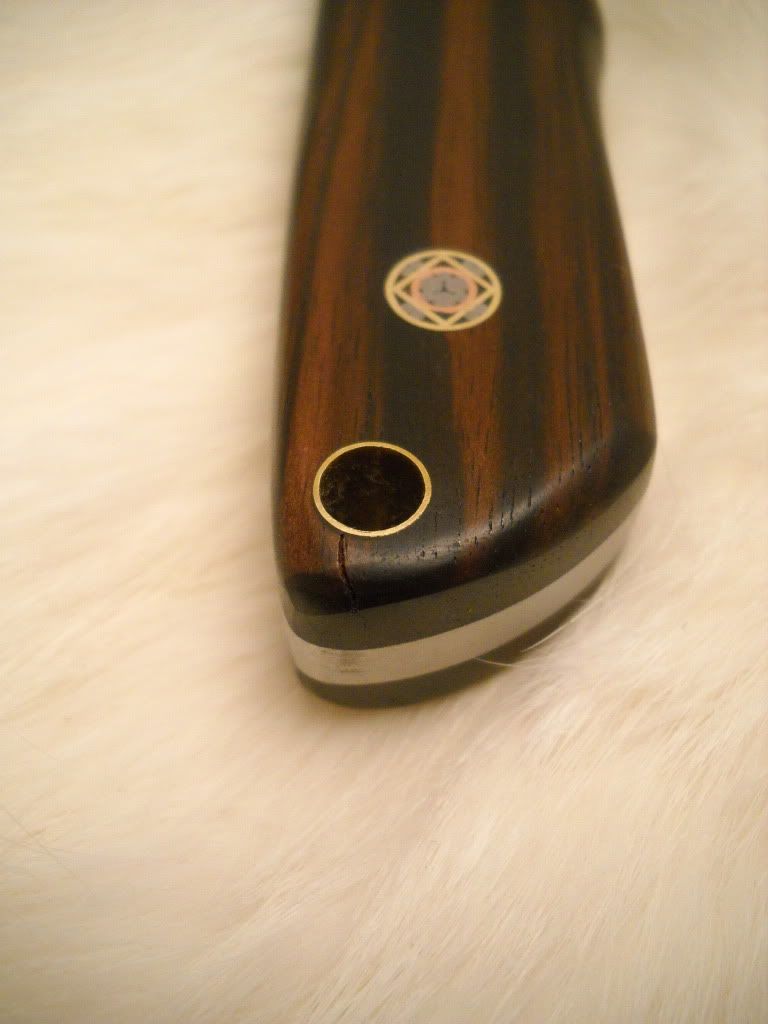

|
|
#2
04-30-2012, 03:38 AM
|
||||
|
||||
|
As far as the crack goes have you thought about alumilite?
You can color to match the wood if you need too. If you decide to try it, overfill the crack by a bit. Then after its dry you can sand to match the contour of the rest of the handle. But what do I know, I am just a fly tier that makes knives. Jeff
|
|
#3
04-30-2012, 06:43 AM
|
|||
|
|||
|
Perhaps sawdust from that wood puttied with epoxy?
|
|
#4
04-30-2012, 08:16 AM
|
||||
|
||||
|
Hamons are not all that easy. I assume that you did the etching and sanding before the handle was attached as you should have. Satanite works fine if you apply it to about the same thickness as the blade you're putting it on. Then, wrap the blade with baling wire so that the wire sinks into the Satanite with the coils about 1/2" apart. Let the clay dry for at least a day before you do the HT. Most of the clay will not separate from the blade this way, the part that might should be held in place by the wire minimizing the problem. The etching and sanding/polishing can be very involved and time consuming. I suggest you look up Bob Engnath's website and read his explanation of the etching process.
The best way to fix that split in the handle is to avoid the problem in the first place. Either drill the hole to clearance size and then glue the tube and/or flare the ends with a flaring tool or measure the tube's diameter precisely and then drill/ream the hole to about 5 thousandths smaller than the tube size. Or, it's a little more trouble but you could do exactly what you did for pressing the tube but make sure the wood is drilled oversized for clearance first .... __________________ Your question may already have been answered - try the Search button first!   
|
|
#5
04-30-2012, 10:03 AM
|
||||
|
||||
|
Depending on how oily the wood is, I would use either Elmer's wood glue or epoxy mixed with some very fine wood dust from the same kind of wood. Fill it "proud", and sand it down once it has cured...
__________________ Chris K. Two Mountains Forge Delta, BC, Canada www.twomountainsforge.com
|
|
#6
04-30-2012, 11:14 AM
|
||||
|
||||
|
Ray gave you some excellent advice on the lanyard hole. If it is too tight it may continue to split. We tend not to think of it that way but wood and too some extend other products continue to expand and contract with given conditions.
I would try the epoxy mixed with sanding dust. It will show but not badly and the epoxy has the most chance of holding the fix given that the wood will continue to move! I would also think about leaving a little more wood at the end of the knife on the next lanyard hole. As for the hamon chalk that one up to experience. I would be more concerned about the things showing up in the close-up of the blade. Quote:
__________________ C Craft Customs With every custom knife I build I try to accomplish three things. I want that knife to look so good you just have to pick it up, feel so good in your hand you can't wait to try it, and once you use it, you never want to put it down ! If I capture those three factors in each knife I build, I am assured the knife will become a piece that is used and treasured by its owner! C Craft
|
|
#7
04-30-2012, 11:29 AM
|
|||
|
|||
|
For the hamon you might try a steel with less carbon that will give you more ferrite in the pearletic steel formed under the clay coat. I have also found that furnace patch cement holds to steel better than Satanite.
As far as the split in the handle goes, I hate to say it, the best thing to do is remove the handle and replace the scales. Patching will always look like a patch. However, if it's something you will be carrying, you might just want to leave well enough alone. Also, if you want a black wood, try African Blackwood. The ebonies are rather prone to checking. Some of the rosewoods have an appearance similar to the wood that you used. Lignum vitae is also a wood that looks close to that and is quite durable. Doug __________________ If you're not making mistakes then you're not trying hard enough
|
|
#8
05-01-2012, 07:17 PM
|
|||
|
|||
|
I had no idea i had to leave the clay on so long before HT, I will definitely try longer than the 5 minutes this one had it on for.
I'll have to see how the dust+epoxy works for the crack, It isn't noticeable when the lanyard is on but if i don't fix it it will bug the crap out of me. For future knives i believe i will being staying away from ebony, i have a lot of other woods that i like better. But seeing that I only paid a few bucks for it I wanted to see how it looked on a knife.
|
|
#9
05-01-2012, 07:25 PM
|
|||
|
|||
|
Hey man, It looks to me that what happened with your hamon was caused from the scotchbrite belt and having to much padding on whatever you were using to sand the blade with and maybe a little to much etching. Try using a good hardwood block with some 600 grit paper and "block" the high spots off. Then work your way up to 1000. That should be plenty fine enough to etch. Another thing that might help is doing several very short cycles in the acid and try a less potent ratio. As far as the crack goes I think that was answered pretty good
|
|
#10
05-01-2012, 10:18 PM
|
|||
|
|||
|
The pattern on the blade was there after the etch, I only used the scotch brite to try to cover up the pattern.
I think Ray hit the nail on the head with the suggestion of letting the clay sit on the blade overnight and wire wrapping it. I have 3 blades about ready for HT now so we will see what happens.
|
|
#11
05-01-2012, 10:40 PM
|
||||
|
||||
|
Looks like you over heated your blade and did not normalize properly afterwards. Might have even happened during your heat prior to quench. it happens sometimes and we've all done it. To fix it you will have to tear it apart. Pretty much the same with the handle.. If you leave it you will just be covering the problem. And one that large will not go away but just haunt you.
__________________ http://www.woodchuckforge.com Avatar, Scott Taylor Memorial Scholarship Knife Photo by Bob Glassman Chuck Richards ABS J.S.
|
|
#12
05-01-2012, 11:26 PM
|
|||
|
|||
|
Quote:
As for overheating i don't have any reliable method of accurately reading the forge temp other than the steel becoming non magnetic. I let the blade heat up until i couldn't feel any attraction from the neodymium magnets, i put it back into the forge for another 10 seconds than right into the parks 50 for 30 seconds after convection stopped. It passed the file test afterwards, and chopped through bailing wire after the final edge was put on with only the slightest mark on the edge. Seems like a good knife to me? or is this another case of "head up my butt itis"
|
|
#13
05-01-2012, 11:33 PM
|
||||
|
||||
|
This is more common than many think. Just because you do stock removal does not mean you don't need to noramlize. Do you know for sure what was done at the foundry when this steel was produced. If you purchased HR annealed you are closer but still not absolute. I always try to do at lest one good normalize even on stock removal. It does not mean it is a bad knife. Just not as good as it could be. It can and will perform better than most factory knives out there. But if you are going after the all elusive hamon it is a completely different story. Everything has to be just right or it will not turn out. Believe me I fight it every time I try one.
Good luck and keep on cuttin __________________ http://www.woodchuckforge.com Avatar, Scott Taylor Memorial Scholarship Knife Photo by Bob Glassman Chuck Richards ABS J.S.
|
|
#14
05-02-2012, 10:05 AM
|
|||
|
|||
|
Ok, I would say that you did a good heat treat on your blade. Forges are problematic when it comes to heat treating but they're all most of us have. Be aware that heating to non-magnetic can be misleading. Steel doesn't austinize until around 50 degrees or so after it becomes non-magnetic so I watch for the non-magnetic point a little closely and then get the blade just a little brighter. I also hold at that temperature/color for about 30 seconds to a minute to make sure it's heated throughout, which may require taking the blade in and out of the fire for a couple of seconds at a time to prevent overheating. Steels that have more carbon than what you are using require a longer soak time to dissolve the carbides. It also helps if you can turn your forge down. What I do is run my heat treating forge full open until it's really hot, then I turn the gas back and run it at around 1600 degrees. I have a needle valve on my gas line for this purpose and I have a pyrometer in it to monitor the temperature.
Doug __________________ If you're not making mistakes then you're not trying hard enough
|
|
| Tags |
| advice, blade, brass, edge, forge, forging, hamon, handle, heat treat, knife, knives, press, scales, steel, tips |
| Currently Active Users Viewing This Thread: 1 (0 members and 1 guests) | |
|
|
 Similar Threads
|
||||
| Thread | Thread Starter | Forum | Replies | Last Post |
| latest knife | jdale | The Newbies Arena | 12 | 04-27-2012 09:32 AM |
| Latest knife | maxmadco | The Display Case | 0 | 12-02-2010 05:52 PM |
| Latest knife | 6T7L71CPE | The Newbies Arena | 9 | 04-26-2008 10:31 PM |
| My Latest Knife | jrowe | The Display Case | 3 | 02-25-2007 06:58 PM |
| Latest Knife | Lawrence Kemp | The Outpost | 20 | 08-06-2003 12:08 PM |


 Linear Mode

