|
|
|||||||
| Register | All Photos | FAQ | Members List | Calendar | ShopStream (Radio/TV) | Search | Today's Posts | Mark Forums Read |
| Tool Time Let's talk shop. Equipment, Tips & Tricks, Safety issues - Post it here. |
 |
|
|
Thread Tools | Display Modes |
|
#46
 08-29-2012, 02:42 AM
|
||||
|
||||
|
Quote:
To avoid premature hardening you can ice the resin. I'm in the tropics so I have the same problem with resins. What I do is use a small container to mix the resin in, then have a slightly larger container filled with ice that you set the mixing container in. The ice surrounding the mixing container really slows down the reaction. I can stretch a resin that would normally gel in 5mins to take 45+ mins. The downside is if the resin gets too cold it thickens and also it can condensate moisture from the air into the resin(which creates a resin that doesn't want to cure properly). I've only had a problem with moisture if the resin gets very cold. At a bit below room temp it works fine. 
|
|
#47
08-30-2012, 03:26 PM
|
|||
|
|||
|
As an ex fiberglass boatbuilder, I have worked with polyester and epoxy resins for years. I strongly recommend epoxy over polyester. Polyester is more affected by UV than epoxy and will, over time, absorb water while epoxy is, for all practical purposes, waterproof. Probably the easiest epoxy to use is that made by Gougeon Bros. It is called the West System and uses measuring pumps to dispense the epoxy. 1 pump of resin + 1 pump of hardener (slow is probably best), mix and apply. To eliminate bubbles, vacuum bagging is best, and not too expensive. It will also give you a better resin to cloth ratio. If you don't want to vacuum bag, apply the resin to a layer of cloth with a disposable paint brush (not the Chinese ones because they will shed bristles into the layup)and, using a serrated roller, roll the cloth until all the bubbles are gone. Put down the next layer of cloth, apply resin, roll, etc., until the material is thick enough. Once you have built up about 1/4", stop and let it kick off. Don't go more than 1/4" at a time because it can build up too much heat. I think Gougeon has written some books which explain the process in more detail.
|
|
#48
09-01-2012, 12:58 PM
|
||||
|
||||
|
Quote:
I agree with what you said about epoxy but I just wanted to point out the properties of the resin have a lot to do with the manufacturer as well. For example the polyester resin I buy locally has better UV properties (UV additives are added I am sure) and actually adheres better than some epoxy brands...like Devcon. Resins like West system are the way to go but for those of you not used to using resin don't assume an epoxy is always better than a polyester or vinyl ester...it usually is, but not always.
|
|
#49
10-19-2012, 04:55 AM
|
|||
|
|||
|
I've been playing with the Laminates for a while. I use the MAS Epoxies Low Viscosity Epoxy Resin and Hardener. Very thin, water clear, and the fast gives me around 15 min to work even when it's 70-75 degrees. It's also food safe when fully cured and tough as heck. I use around 15-20oz per batch usually to make a block around 2" wide by 1.25" tall. I usually have some left over. I pour the epoxy into tin trays to let it spread out and not be as hot. I've had batches where I used a total of around 40 oz of epoxy/hardener in a large mold and when I touched the mold a few minutes after I pressed it the last time, I almost got burned. It gets hot, quick!!!
Denim will show more texture and will darken a lot. Thinner linens won't darken as much. Burlap will darken a little, but not much. Cotton Yarn I found doesn't really change color at all. Flannel doesn't change color much, but really compresses a lot and soaks up epoxy. I used around the same amount of fabric in Flannel and the block was 1/2 the height of the linen block with the same amount of pressure and it used more epoxy (around 24oz IIRC) than the linens, but left a smoother surface. I try to keep the same fabric's together, otherwise you have a smooth texture bordered by a rough/coarse texture and it doesn't look as nice. Air bubbles I fill with Mas Rapid Cure epoxy. Waterproof and clear, it sets up quickly and I let it sit for a full day to fully harden before sanding down. Works well on wood, too. Stacked Laminates: 22-24 layers in Denim and around 30 layers in Linen gives around 3/8"-1/2" thick, depending on the thickness of the materials and pressure used: Black/Red, Red/Orange Burlap, Green/Black, Desert Ironwood as the 4th:   Denim:  Camo, I chop up the fabric with a rotary cutter and mix. Pieces 3/8"-3/4" work pretty well for me, but I aim for a random size/shape:       This is using Burlap where I cut 3-4" pieces and then pull the strands apart and mix:  Takes a good amount of material, though and time to pull the strands apart. For the flat layered pieces, I use pieces of 1/4" plate steel, 13x4" and C Clamps. Pachement paper goes over the plates and I stack up, brushing the mixed epoxy on each layer. For the Camo's, I use a mold shaped like \__/ with a metal 3/8" thick plate the same dimension as the bottom of the mold. I close off the end of the mold with lots of duct tape and line the mold with Parchment paper. I mix the resin/hardener together and pour out half into a tin foil pan on top of a few handfuls of chopped up fabric and mix and let soak in. I pack the material into the mold until the mold is filled and then compress it with a shop press, then repeat the process of adding epoxy to the fabric, letting it soak in, packing the mold and then compressing. When I compress the material, I put it into a plastic bag before I compress and with the press plate outside the plastic so it doesn't get epoxy all over it. For the final press, I put the press plate on top of the parchment paper and it's wrapped in parchment paper and with a plastic bag around the whole thing so any leakage is contained and not all over my press. I do the final compress and remove from the shop press and C Clamp the heck out of it and let it cure. I am in the process of building a new shop press with a 20ton bottle jack and 2x5x18" long rectangular steel tubing, so I would have a flat 2x5 as my main press plate and I can add smaller ram's to it for the smaller molds. It should help keep the flat stacked pieces more even, too.
|
|
#51
10-21-2012, 03:04 PM
|
|||
|
|||
|
After some more fooling around I found out that they are not bubbles. There tiny white dust particles that were in the resin. I'm going to try to strain it with a paint filter next time. Hopefully that helps.
|
|
#52
10-21-2012, 04:16 PM
|
|||
|
|||
|
I found that bigger pieces, like a couple of inches long, didn't work as well when I was using C clamps; I got some fold overs that didn't compress tightly and the epoxy filled the void. With the press, I don't think it would be an issue, but I found that I liked the pattern best at like 1/4-5/8" pieces each dimension or so. I tried going very fine and didn't see much difference for the extra work involved. Pieces 1"-1.5" big or so didn't have as nice of a pattern. If you want to do the little pieces, invest in a rotary razor cutter with a replaceable blade and a good cutting mat. Much easier than scissors!
|
|
#53
10-21-2012, 09:39 PM
|
|||
|
|||
|
I have filleted a thumb using an Olfa Rotary Cutter cutting strips for my grandmother. And have a small one myself for thin leather. I wish I had a vacuum setup. I'd try this with all my excess leather swatches and shred them up into 3/8ths peices, add resin, then put under negative atmosphere to suck the resin into the leather peices. I think it'd be sweet but creating that high of a vacuum is a bit of a long shot at the moment
|
|
#54
10-21-2012, 09:48 PM
|
|||
|
|||
|
Yeah, those wheels are SHARP!! I have one of the bigger ones from Fiskars, 2 1/4" blade. With thinner epoxies, you may not need the vacuum setup. The MAS Epoxy I use is VERY thin and soaks thru fabrics very quickly.
There was a post on another forum about stabilizing wood and using vacuum pots and stuff, how much pressure do you need?
|
|
#56
11-09-2012, 04:49 AM
|
||||
|
||||
|
Quote:

|
|
#57
11-09-2012, 07:32 AM
|
|||
|
|||
|
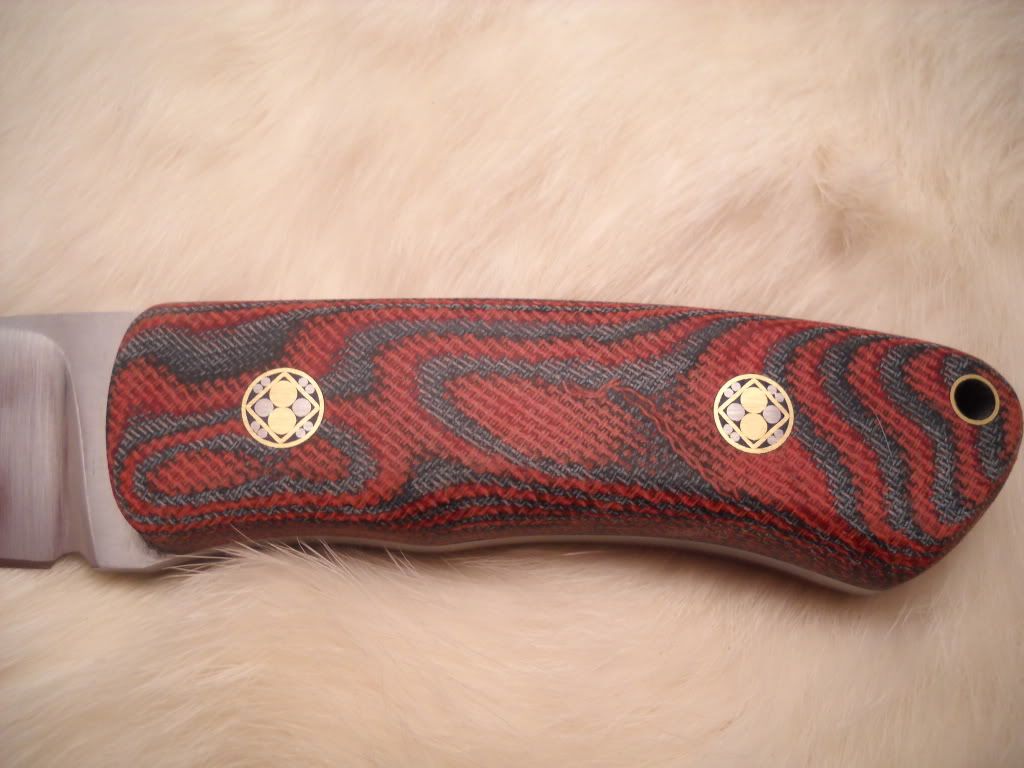
The red material was bottom weight fabric, and the black was denim from a old pair of jeans. i layered the material between coats of bondo fiberglass resin. I made a form out of some 2x4's, twisted the layered bundle and clamped it in the form with C clamps.
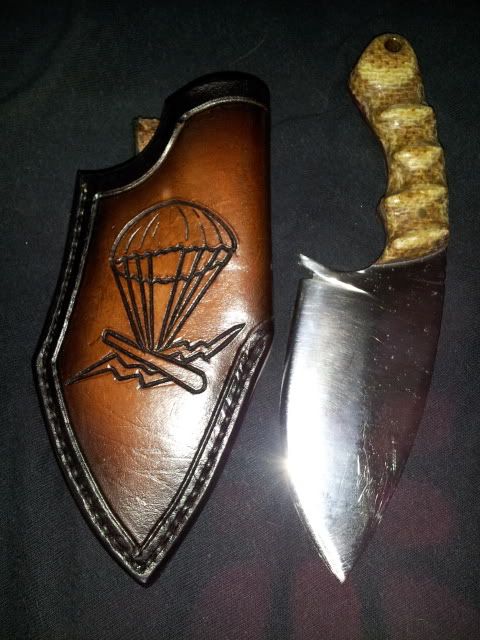
I just got an order for three hunting knives, the buyer is a big University of Michigan fan. looks like i found a new market, sport team themed knives. I am going to see if i can find a U of M emblem to set into the sheath as well.
|
|
#58
11-09-2012, 07:48 AM
|
|||
|
|||
|
It looks like red denim or bottomweight. I get bold and go to a local fabric store and get all sorts of colors of materials! Red, Green, Orange, Black, Tan, Blue, white, etc. Even the zebra print looks cool mixed in with other colors. I get some weird looks, especially when I am pushing a cart with 12-15 bolts of fabric and then go to the counter to get 2-3 yds of each. The people in line behind me get ticked; most people get 1-4 bolts and maybe a yard from each of fabric, so they are in and out in under 5 minutes. Usually takes over 30-45 minutes for the people to cut my stuff. Many fabric stores will have Remnants (left overs less than 1 yd in length on the bolt) that they sell for up to 50% off. Great way to experiment with colors and fabrics! I stick to all 100% cotton stuff or Jute Burlaps.
I got a new press made and tried it out. I was using a 6 ton A frame press from Harbor Freight and it worked OK sometimes, but other times, I had a lot of bubbles. From the piece that the press sits on, a 1" diameter rod comes down and I have 1/2" thick metal plates on top of my material to press it down into the mold. I think the 1/2" plate was flexing, because I would often have bubbles or lopsided blocks. The new press has a 2x6 that I reinforced with 1.5" sq tubing to press down on various size blocks/tubing onto the metal plate. For my 2.5x6" mold, I use 1/4" thick wall 2x4" tubing to press down on the metal plate. Much better distribution of force on the mold! The first time, I used my new 20 ton jack and ended up smooshing almost all of the epoxy out of the fabric. Oops! Next time, 6 ton jack worked really well  New Mega Moosher:  You can see my small mold 2.5"x6" and the bigger 3.5"X7" mold on the bottom and on the top, the various pieces I use to spread out the press force to where I need it for the mold being used. Funny you mention sports teams!! Guy wanted an Ohio State Univ themed knife handle:  Red Burlap, Grey and White Denim First block with the new press, no bubbles
|
|
#59
03-31-2013, 06:42 PM
|
||||
|
||||
|
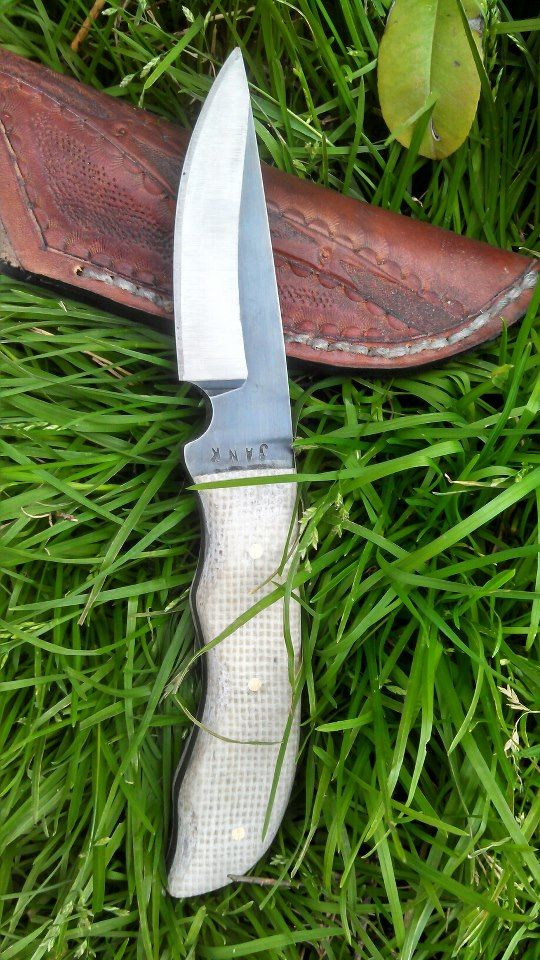
I use a lot of burlap too, I buy white and dye it various colors. This little is one of my best sellers in white burlap, I get orders for at least five a week. I never have bought micarta, I am thinking of getting some of that kirinite.
|
|
| Tags |
| art, blade, boker, brand, camo, easy, handle, home, knife, knives, leather, lock, make, material, polish, post, press, project, resin, simple, steel, supply, tang, tips, video |
| Currently Active Users Viewing This Thread: 1 (0 members and 1 guests) | |
| Thread Tools | |
| Display Modes | |
|
|
 Similar Threads
|
||||
| Thread | Thread Starter | Forum | Replies | Last Post |
| Micarta | TOGUN | SBC Forum (Sociedade Brasileira de Cuteleiros) | 5 | 02-06-2008 04:29 AM |
| Need Micarta help | baliluver | The Supply Center | 2 | 10-26-2003 12:14 PM |
| Need help with (Rag Micarta) | Gary Riner | High-Performance Blades | 4 | 05-31-2003 10:48 AM |
| micarta to micarta bonding? | Morgan Meader | The Newbies Arena | 2 | 04-05-2002 04:35 PM |
| micarta | Steve Vanderkolff | The Newbies Arena | 7 | 02-27-2002 04:26 PM |


 the blade work is mine!


 Linear Mode

