|
|
|||||||
| The Newbies Arena Are you new to knife making? Here is all the help you will need. |
 |
|
|
Thread Tools | Display Modes |
|
#1
 08-16-2012, 01:31 PM
|
||||
|
||||
|
WIP small Hunting knife
Hey all, I am making a knife for a member of an archery forum I frequent and decided it'd be a good chance to do a work in progress thread.
After emailing back and forth we came up with a design he liked and chose the steel he wanted. The steel is 1/8" CPM S30V 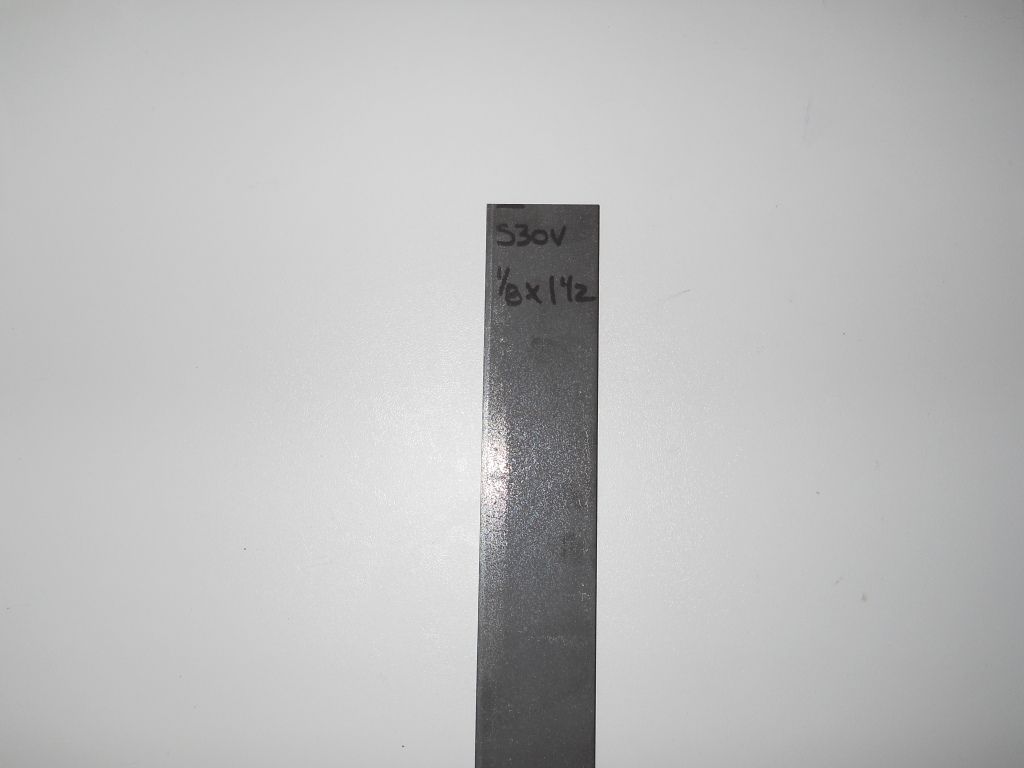 first off transfer the design onto the steel.  then cut the piece off the bar.  Action shot of me grinding to profile, leaving about 1/16" extra meat around the edges of the blade to allow a little wiggle room while grinding the bevels.  Profile ground and ready for bevels.   Stay tuned more to come...... __________________ StaySharp 
|
|
#2
08-16-2012, 05:00 PM
|
||||
|
||||
|
I got into the zone and forgot to take a couple pics, first I ground off all the mill scale from the sides of the blank using the worn out 60x belt that I used to profile the blank. I then colored the edge with black sharpie and with a 1/8" drill bit I lay the blank flat on my glass surface plate and use the drill bit to mark the centre line of the blank. this gives me a refernce point to grind up to so the edge will be centred. Next I clamp the blank in the vise and with a mill ba$tard file I break the corners of the edge. This keeps the 90 degree edge from stripping the abrasive off the belt. Now I clamp on my plunge guide and grind in the bevels. starting with a fresh 60x belt then going straight to a 220x belt. once the bevels are ground in I go to the drill press to drill and countersink the pin holes and the exposed lanyard hole. The client wanted jimping in 3 spots on the handle so I went ahead and did that as well.
here's where we are at now,   now it's off to heat treat with it. I send my knives out to be HT'd. usualy takes less than a week there and back so in the mean time I work on the next few projects. More to come.... __________________ StaySharp
|
|
#3
08-29-2012, 06:16 PM
|
||||
|
||||
|
Everything arrived back from HT yesterday. I reailized too late that the bateries in the cam were dead so Got a couple pix with the cell cam.
 here's the rest of the batch, all kinds of sanding waiting for me now. 8) here's the star of the WIP after a couple quick passes with 500 grit to clean it up.  Then I trace the shape of the handles onto the handle material, in this case some awsome spalted maple burl, and cut out the scales then sand to final shape.  dry fit up everything seems tight no large gaps anywhere. 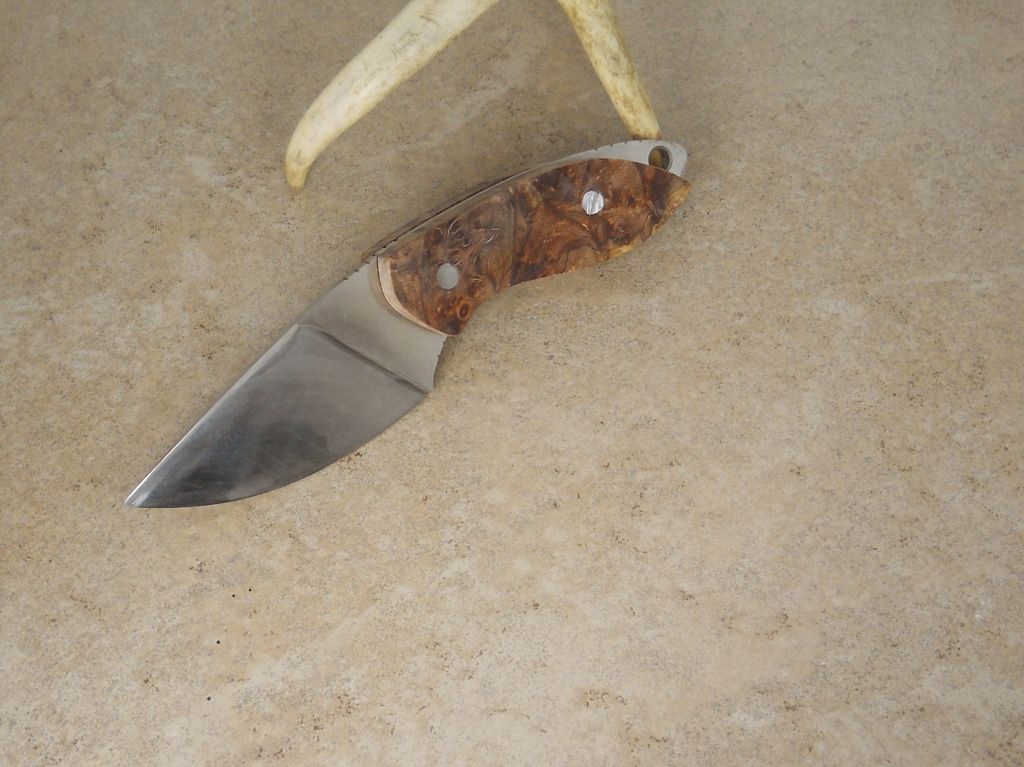 Stay Tuned almost done now. __________________ StaySharp
|
|
#4
09-15-2012, 02:39 PM
|
||||
|
||||
|
Finished. The first set of scales wound up having a large Void right next to the front pin so had to remove them and replace with these black elm burl scales.
Here it is all dressed up in it's new sheath.     Hope you like it. StaySharp __________________ StaySharp
|
|
#6
09-15-2012, 03:46 PM
|
||||
|
||||
|
Nice work & thanks for the WIP.
I'm curious about the grinder that you used to profile the blade. Is this your own design and will you describe how you have the belt held to the wheel? Gary __________________ Gary ABS,CKCA, ABKA,KGA
|
|
#7
09-15-2012, 05:41 PM
|
||||
|
||||
|
Very nice job. You might want to look into getting some Gum Tragacanth - most of the large knife supply places have it - and a nylon burnishing tool (sometimes called a bone folder). These would be used to dress the edges of your sheath and provide a more professional finished look ....
__________________ Your question may already have been answered - try the Search button first!   
|
|
#9
09-15-2012, 06:48 PM
|
||||
|
||||
|
Quote:
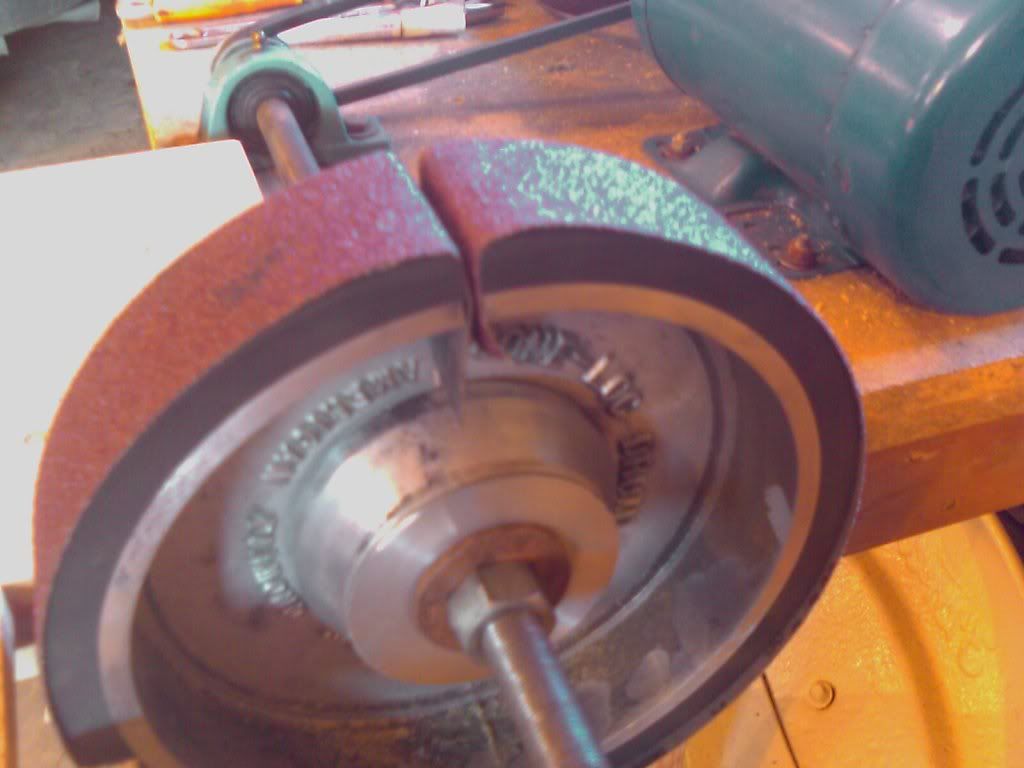 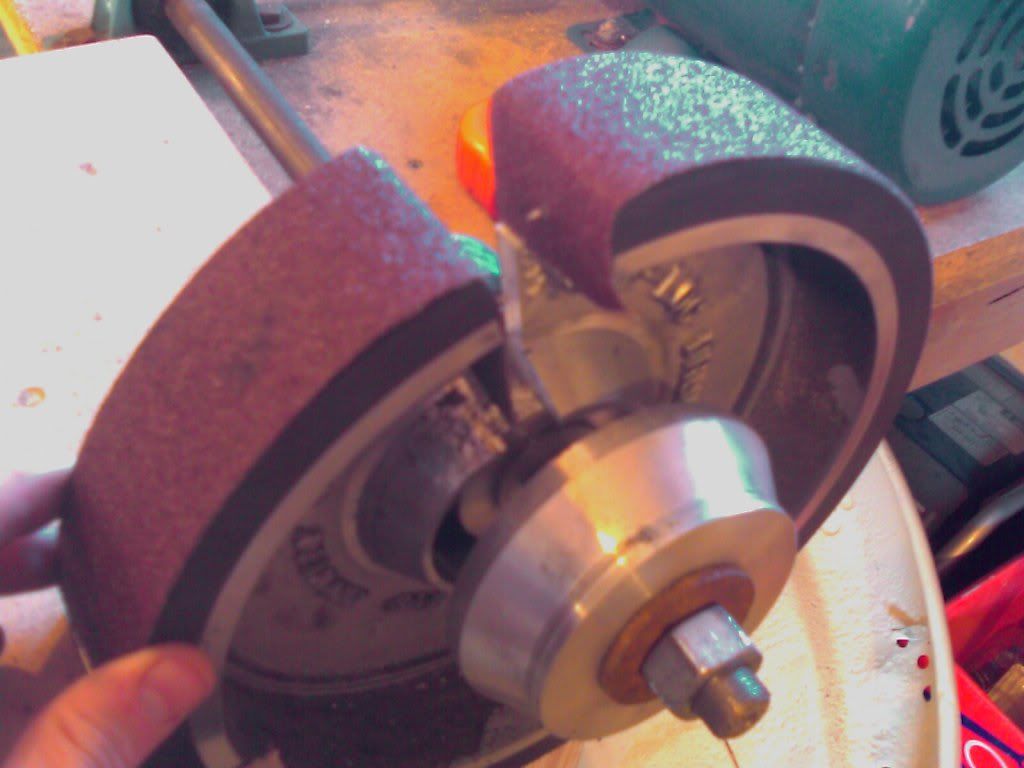 it opens pac-man style and takes a strip of shop roll belt. the hub in the centre fits over a cone shaped protrubance in the centre of the wheel. when the hub is tightened it squeezes the wheel shut tight. my only real complaints with it are: cant flat grind, and cant get shop roll in any abrasive except Alum.oxide. belt life is non exsistant. saving my pennies for a real grinder hopefully soon. thanks for the comments guys __________________ StaySharp Last edited by J.Lec; 09-15-2012 at 07:05 PM.
|
|
| Tags |
| back, blade, design, drill, edge, flat, folder, grind in, grinding, handle, heat treat, hunting, hunting knife, knife, knives, making, material, press, scales, sheath, steel, supply, surface |
| Currently Active Users Viewing This Thread: 1 (0 members and 1 guests) | |
|
|
 Similar Threads
|
||||
| Thread | Thread Starter | Forum | Replies | Last Post |
| Hunting Knife | TheWeatherman | The Newbies Arena | 7 | 06-19-2012 05:05 PM |
| Damascus Hunting Knife 10 1/4 " w/Leather Sheath Hand Made Knife | Robert Washburn | Knives For Sale - Custom | 2 | 03-13-2012 07:17 PM |
| My new hunting knife | pipecrafter | The Display Case | 3 | 09-30-2010 02:51 PM |
| hunting knife | tonn | The Display Case | 7 | 07-14-2004 07:42 PM |
| Hunting Knife | Gene Chapman | The Outpost | 1 | 08-06-2003 03:23 PM |


 Linear Mode

