|
|
|||||||
| Tool Time Let's talk shop. Equipment, Tips & Tricks, Safety issues - Post it here. |
 |
|
|
Thread Tools | Display Modes |
|
#1
 08-03-2007, 11:48 PM
|
|||
|
|||
|
homebuilt 2x72 grinder
well after reading Wayne Goddard's $50 Knife Shop book and after visiting with local knifemaker Ron Duncan and seeing his homebuilt grinders I decided to start working on one. One of my many hobbies is metalcasting so I decided to take the KMG design and cast it from aluminum. I started making the wooden casting patterns tonight. One difference is that isntead of using 1/2 steel all parts will be 3/4" thick, since that's how thick the wood I have is. I basically had a bunch of plywood left over after building my new workbench so I cut the pieces out of that. It's almost pretty enough that I wish I could just make it out of wood. hahahaha
Chris 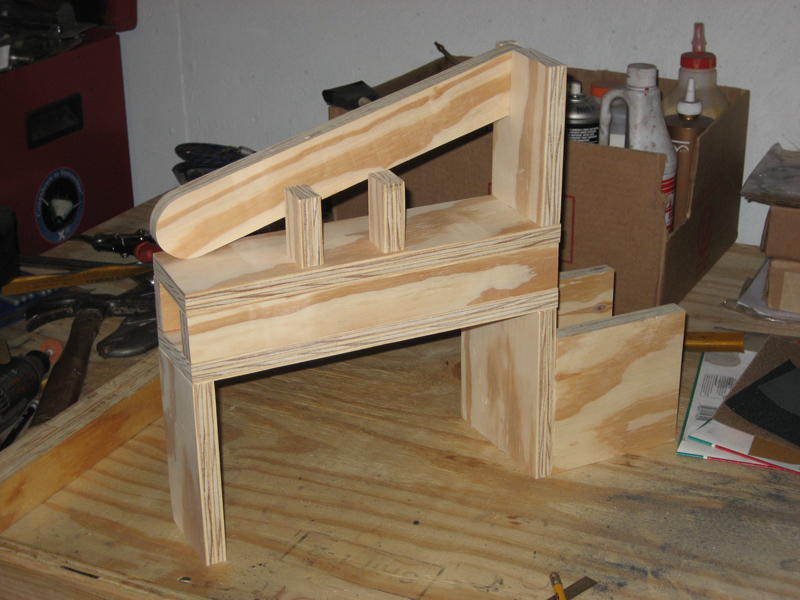 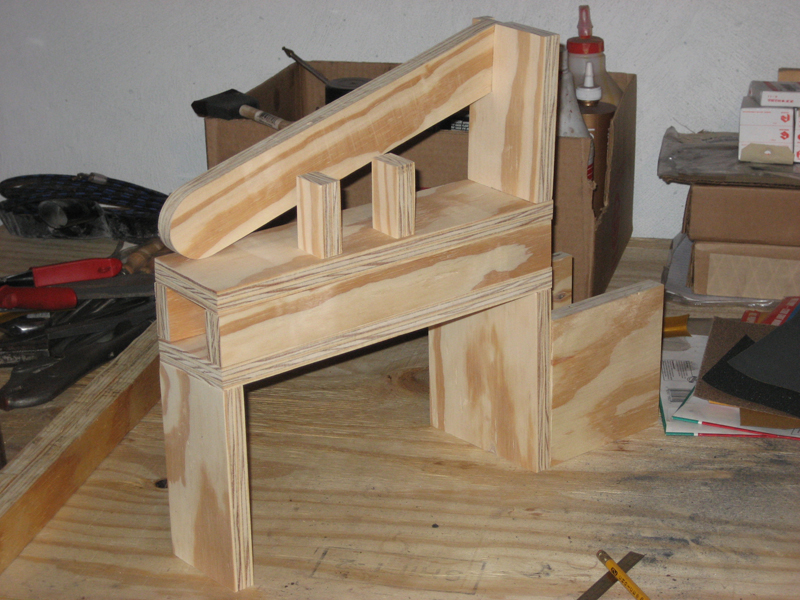 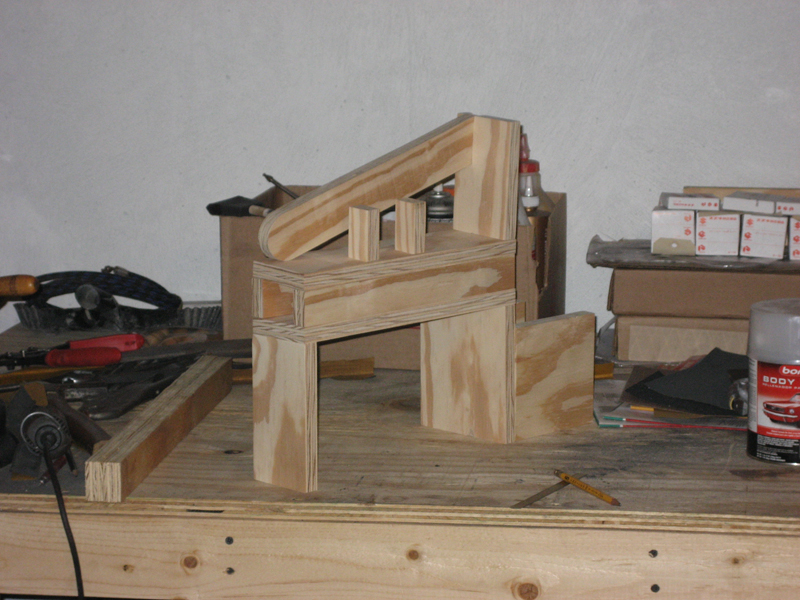

|
|
#2
08-04-2007, 01:05 PM
|
||||
|
||||
|
That sounds like a large scale casting project and an interesting way to build a grinder. I'm sure we'll all be looking forward to seeing your results...
__________________ Your question may already have been answered - try the Search button first!   
|
|
#3
08-04-2007, 01:39 PM
|
|||
|
|||
|
it shouldn't be to terribly bad, I'll have to make some new flasks since some of the parts are to long for the ones I already have. I've got one pattern that I want to remake since I want to move the tension arm over a bit, that way the shaft for the tracking wheel won't be as long. I intentionally made all the patterns a bit oversize so I can put the castings on my mini-mill and machine the mating surfaces down to get a better fit. Then it should just be a matter of bolting it together like the ones built from steel. At least that's the plan. hahahaha
Chris PS. I really like the tutorials on your site.
|
|
#4
08-04-2007, 11:57 PM
|
|||
|
|||
|
I did some more work on the casting patterns tonight. I remade one of the patterns, the one that the tension arm will bolt to, and I added some lettering. I've seen lots of other hobbicasters use lettering on there castings so they could put there name on it, or the name of the machine, etc. So I decided to try that, sure it looks a bit cheesy, but hey, people sign their knives, I sign my castings. hahahaha
The wooden patterns have now been sanded, then imperfections filled with bondo, sanded again, and are ready for clear coat. These pictures were taken right before I started gluing the parts together as they will be cast. Tomorrow I'll clear coat the patterns and hopefully they will be done. Maybe next weekend I can do the casting, or at least get started on it. 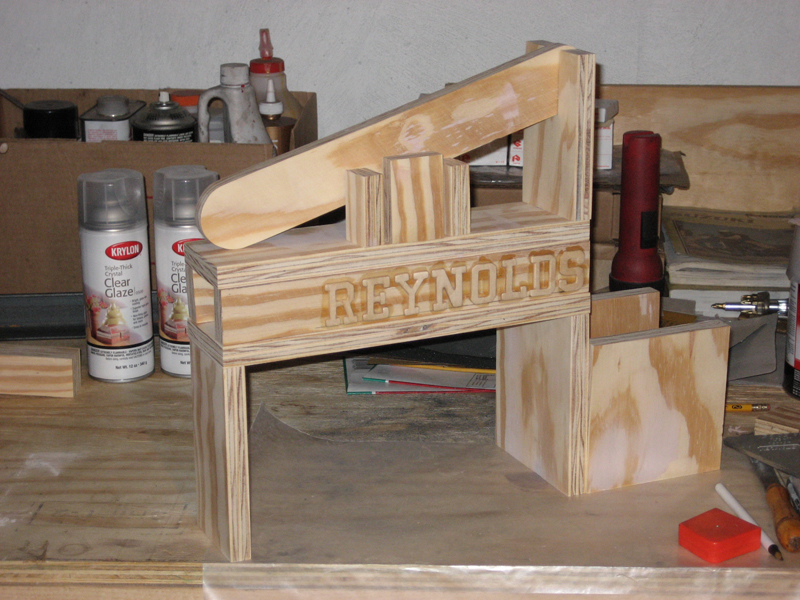 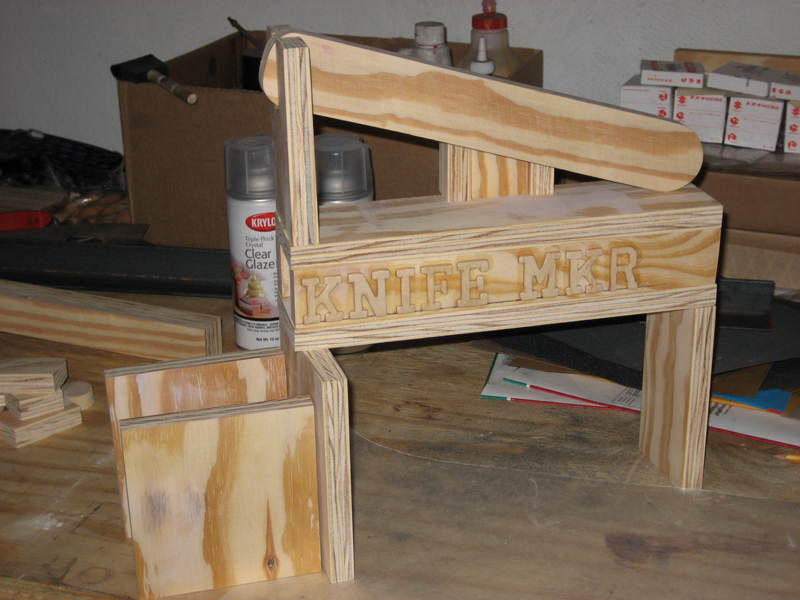
|
|
#5
08-05-2007, 04:08 AM
|
||||
|
||||
|
Quote:
goneflyin, Keep the photos coming, this is turning into a tutorial in and of itself! Nathan
|
|
#6
08-05-2007, 09:02 AM
|
||||
|
||||
|
Chris,
I second Nathan's opinion, this could be a tutorial too. I'm looking forward to seeing how that form gets used. Right now, I haven't a clue .... __________________ Your question may already have been answered - try the Search button first!
|
|
#7
08-05-2007, 11:10 AM
|
|||
|
|||
|
so I've been working on the casting patterns again today. I've just been out spraying on the clear coat. Here is a picture of all the parts on the table. I elevated them all on plastic cups to help prevent a raised edge from forming on the bottom from the spray which would have to be sanded down.
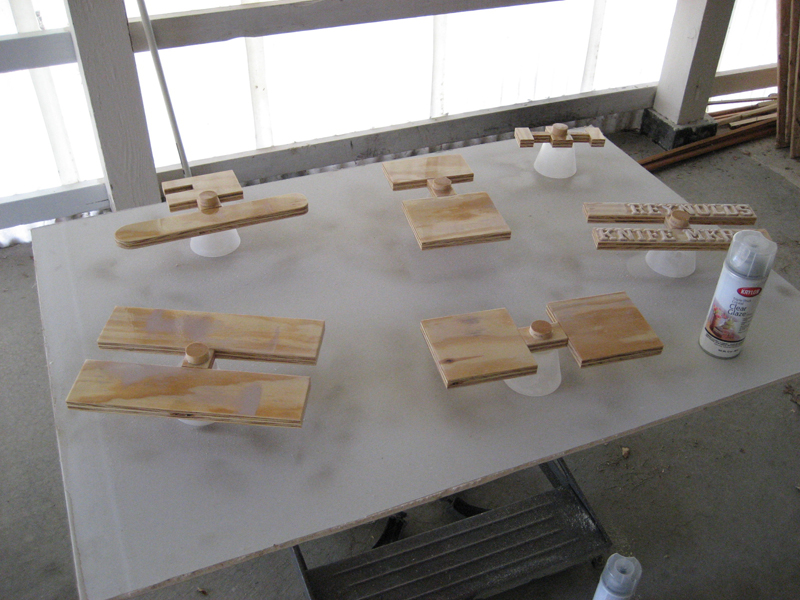 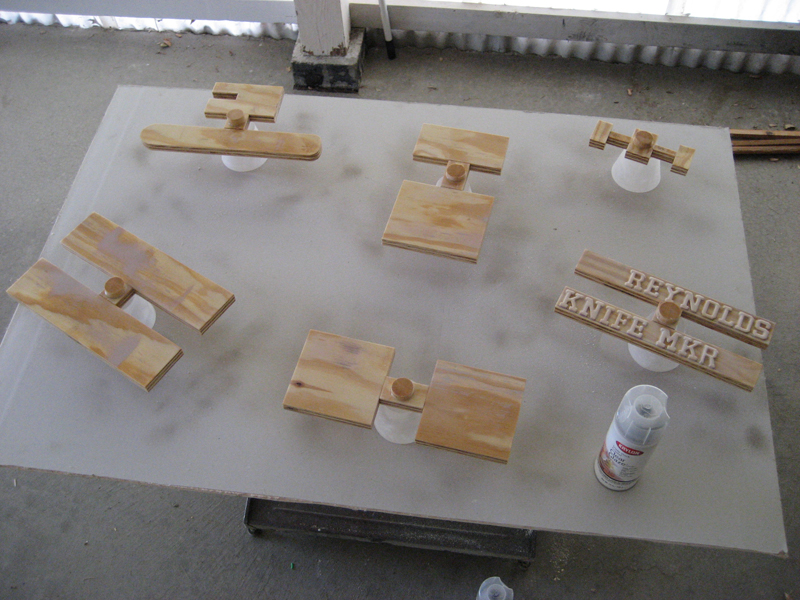 The pictures below show the side pieces with the lettering. As I said earlier this is the first time I've tried this so I hope it works out. I'm trying Krylon's Tripple Thick clear glaze which I've never used before but so far I'm pretty happy with the way it's working. It dries really fast and goes on thick. I needed a radius around all the letters because the hard edges will catch in the casting sand and tear up the edges. I could have created the radius with bondo when I was filling imperfections in the parts, but decided to try the Krylon spray and see if I could get it on thick enough to create the radius. Seems to be working. 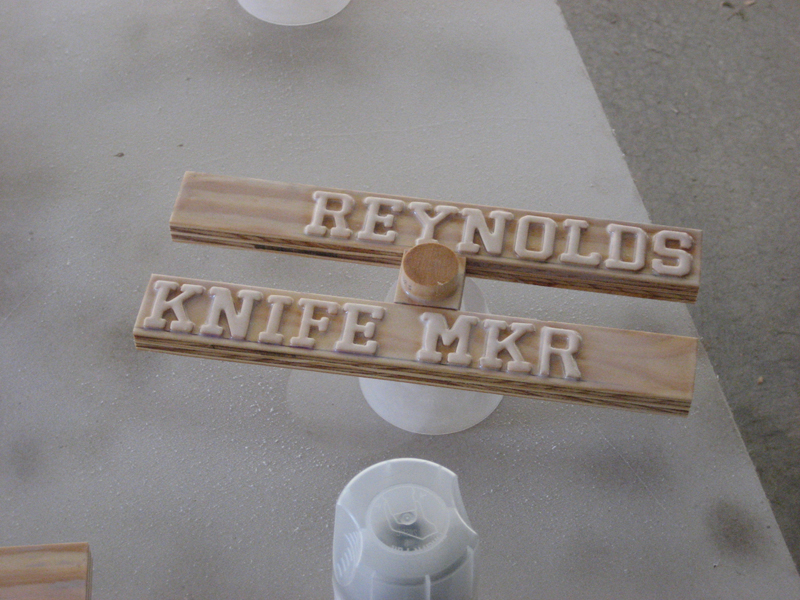 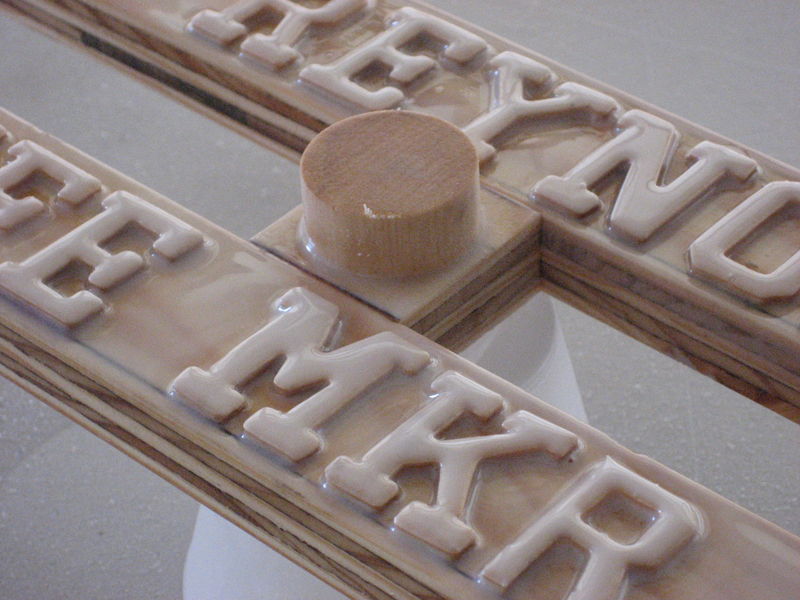 Well more to come later. I need to grab a bite to eat since I just rolled out of bed and started working on this. I haven't bothered to eat anything yet today, luckily my blood sugar seems to be doing fine. LOL the wonders of modern medicine. Chris
|
|
#8
08-05-2007, 11:16 AM
|
|||
|
|||
|
One thing I would like to add to this is that this is by no means the most effecient way of getting a grinder. It would have been so much faster to just go by the bar stock, cut out the parts and bolt it together. However I like metal casting and I have 3 or 4 boxes full of scrap aluminum that I need to so something with, the stuff's just been sitting around for a year or two. So I figured rather that go buy a bunch of new metal why not just use what I have. There is an advantage however to casting, other than just being able to use scrap material that I can get for free or really cheap, casting is a repeatable process. Once the patterns are made it's just a matter of casting more parts. Onece the patterns are done the hard part is over. Well I gues that depends on how you look at it. LOL
Chris
|
|
#9
08-05-2007, 02:11 PM
|
||||
|
||||
|
Chris,
Do you plan to cast your own idler, drive, and contact wheels as well? Nathan
|
|
#10
08-05-2007, 03:00 PM
|
|||
|
|||
|
idlers and drive wheels yes, but due to the size restriction of my metal lathe (8x12) I'll probably end up making a shaped platen to do hollow grinding. I just wouldn't have a way of truing up something like a 10" contact wheel. But casting a shaped platen is realistic. I could cast the bulk of the shaped platen from aluminum and then put a hardened steel plate on the front where the belt would make contact. I started modeling one up in 3d last night but scrapped the design.
Chris
|
|
#11
08-05-2007, 05:11 PM
|
|||
|
|||
|
Just an FYI, you can get a grizzly 10" wheel for about $80, you'll need a bearing though. Cool project, if I ship you the aluminum will you make me one too?

__________________ Cap Hayes See my knives @ knives.caphayes.com This quote pains me: -- "Strategically placed blood grooves control blood spray in covert deanimation activities." --
|
|
#12
08-05-2007, 06:01 PM
|
|||
|
|||
|
I checked out the grizzly site and their 10" wheel is $93.75 not including shipping. I think for the time being I'll stick to seeing what I can make. Besides I enjoy trying to build things for less using what I have or scrap I find. It's like trying to figure out a puzzle.
Chris PS. how about I just loan you my casting patterns LOL 
|
|
#13
08-05-2007, 07:38 PM
|
||||
|
||||
|
Cool project i'm looking forward to it's progress!
Bob
|
|
#14
08-05-2007, 08:55 PM
|
|||
|
|||
|
Quote:
Are there any other hobby metal casters on the forum? Chris
|
|
#15
08-05-2007, 09:10 PM
|
||||
|
||||
|
Quote:
|
|
| Tags |
| blade, knife, knives, made, stainless steel, steel, wax |
| Currently Active Users Viewing This Thread: 1 (0 members and 1 guests) | |
|
|


 Linear Mode

